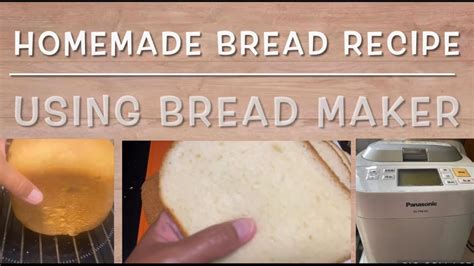
The Ultimate Guide to Baking Bread in Your Panasonic Bread Maker
Panasonic bread makers are known for their ease of use and ability to produce delicious, homemade loaves. This comprehensive guide will walk you through everything you need to know to bake perfect bread using your Panasonic machine, covering basic recipes, troubleshooting tips, and advanced techniques.
Choosing the Right Recipe for Your Panasonic Bread Maker
Before you begin, it's crucial to select a recipe specifically designed for your Panasonic bread maker model. While many recipes are adaptable, using a recipe tailored to your machine ensures optimal results. Your Panasonic bread maker's instruction manual will likely include several basic recipes. These are excellent starting points, allowing you to understand the machine's capabilities before experimenting.
Understanding Recipe Components:
A typical bread recipe for a Panasonic bread maker includes:
- Flour: Bread flour is generally recommended for its higher protein content, which contributes to gluten development and a chewier crumb. All-purpose flour can be substituted, but the result may be slightly less chewy.
- Yeast: Active dry yeast or instant yeast are commonly used. Always check the expiration date. Using old yeast can result in a dough that fails to rise.
- Liquid: Water is the most common liquid, but milk, buttermilk, or even juice can be used for flavor variations. The temperature of the liquid is crucial; it should be lukewarm, not hot.
- Sugar: Sugar feeds the yeast and contributes to browning and flavor.
- Salt: Salt controls yeast activity and adds flavor.
- Fat: Butter, oil, or shortening can be added for richness and tenderness. The type and amount of fat can significantly impact the final texture.
- Optional additions: Nuts, seeds, dried fruits, and spices can be added to enhance the flavor and texture of your bread. Add these ingredients during the designated stages in your chosen recipe.
Basic Panasonic Bread Maker Recipe:
This recipe serves as a foundation for countless variations. Remember to adjust quantities based on your Panasonic bread maker's capacity.
Ingredients:
- 1 cup lukewarm water (105-115°F)
- 1 ½ teaspoons active dry yeast (or 1 teaspoon instant yeast)
- 1 teaspoon sugar
- 1 teaspoon salt
- 2 tablespoons vegetable oil
- 3 cups bread flour (or all-purpose flour)
Instructions:
- Add ingredients to the bread pan: Follow the order specified in your Panasonic bread maker's instruction manual. Generally, liquids go in first, followed by dry ingredients.
- Select the basic bread setting: Your Panasonic bread maker should have a setting specifically for basic white bread.
- Start the machine: Let the bread maker do its work! The baking time will vary depending on your model and the chosen setting.
- Remove and cool: Once the baking cycle is complete, carefully remove the bread from the pan and let it cool completely on a wire rack before slicing.
Troubleshooting Common Problems:
- Dough not rising: This could indicate old yeast, incorrect water temperature, or insufficient sugar.
- Dense bread: Insufficient kneading time, too much flour, or insufficient yeast can lead to a dense loaf.
- Burnt bread: Check the crust color during baking. Adjust the crust setting if necessary.
Advanced Techniques and Recipe Variations:
Once comfortable with the basics, experiment with these techniques:
- Different flours: Try whole wheat, rye, or sourdough flour for unique flavors and textures. You may need to adjust the liquid amount depending on the flour type.
- Adding fruits and nuts: Experiment with various combinations of dried fruits, nuts, and seeds. Add them during the appropriate stage indicated in your recipe.
- Sweet bread variations: Add more sugar, cinnamon, and spices to create delicious sweet loaves.
Optimizing Your Panasonic Bread Maker Experience:
- Clean your bread maker regularly: This will ensure optimal performance and prevent contamination.
- Use fresh ingredients: Fresh yeast and high-quality flour are key to successful baking.
- Follow the instructions: Always consult your Panasonic bread maker's instruction manual for specific guidance and troubleshooting tips.
By following these tips and experimenting with different recipes, you’ll master the art of bread making with your Panasonic bread maker, enjoying delicious, freshly baked loaves whenever you desire. Remember that practice makes perfect! Don't be discouraged if your first few attempts aren't perfect – keep experimenting, and you'll soon be baking bread like a pro.

