The Ultimate Guide to Baking the Perfect Cherry Scones
Are you ready to tantalize your taste buds with the irresistible aroma and delightful crumb of homemade cherry scones? This comprehensive guide will walk you through each step, ensuring you bake the perfect batch every time. We'll cover everything from selecting the right ingredients to achieving that signature scone texture. Get ready to impress your friends and family with these delectable treats!
Choosing Your Ingredients: The Foundation of Flavor
The quality of your ingredients directly impacts the final taste and texture of your cherry scones. Let's explore the key players:
1. Flour Power: All-Purpose vs. Cake Flour
While all-purpose flour works well, cake flour can result in a slightly more tender crumb. Experiment to find your preference! Tip: Always measure your flour accurately using the spoon-and-level method to avoid overly dense scones.
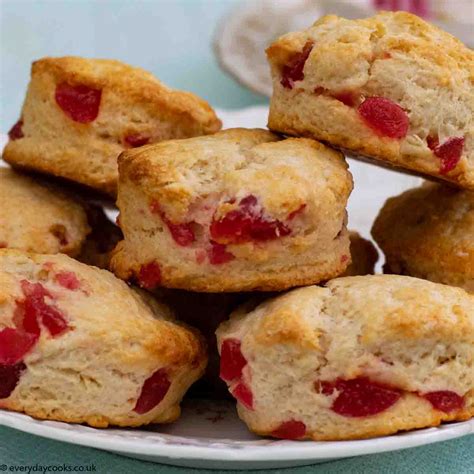
2. Sweet Cherry Success: Fresh vs. Frozen
Both fresh and frozen cherries work beautifully. If using fresh cherries, pit them carefully and pat them dry to prevent a soggy scone. Frozen cherries should be thawed and drained well before incorporating them into the dough. Pro Tip: A mix of sweet and tart cherries adds delightful complexity.
3. Butter is Key: Cold and Cubed
Cold butter is crucial for creating flaky layers in your scones. Cut the butter into small cubes and work it into the flour mixture using a pastry blender or your fingertips. Avoid overmixing, as this will result in tough scones.
4. Sweetening the Deal: Sugar Choices
Granulated sugar provides sweetness, while a touch of caster sugar can add a finer texture. Don't be afraid to experiment with different types of sugar to find your perfect balance.
The Step-by-Step Baking Process: From Dough to Deliciousness
This recipe yields approximately 8 scones.
Ingredients:
- 2 cups all-purpose flour (or cake flour)
- 1/4 cup granulated sugar
- 1/4 cup caster sugar (optional)
- 1 tbsp baking powder
- 1/2 tsp baking soda
- 1/4 tsp salt
- 1/2 cup (1 stick) cold unsalted butter, cubed
- 1 cup heavy cream
- 1 large egg, lightly beaten
- 1 cup pitted fresh or thawed frozen cherries
Instructions:
- Preheat & Prep: Preheat your oven to 400°F (200°C). Line a baking sheet with parchment paper.
- Dry Ingredients: In a large bowl, whisk together the flour, granulated sugar, caster sugar (if using), baking powder, baking soda, and salt.
- Cut in Butter: Add the cold, cubed butter to the dry ingredients. Use a pastry blender or your fingertips to cut the butter into the flour mixture until it resembles coarse crumbs.
- Add Wet Ingredients: In a separate bowl, whisk together the heavy cream and beaten egg. Gradually add the wet ingredients to the dry ingredients, mixing gently until just combined. Do not overmix.
- Fold in Cherries: Gently fold in the pitted cherries.
- Shape & Bake: Turn the dough out onto a lightly floured surface. Pat the dough into a 1-inch thick circle. Use a sharp knife or biscuit cutter to cut the dough into 8 wedges.
- Bake: Place the scones onto the prepared baking sheet. Brush the tops with a little extra cream or milk for a golden brown finish. Bake for 15-20 minutes, or until golden brown.
- Cool & Enjoy: Let the scones cool on a wire rack before serving. Enjoy warm with clotted cream and jam!
Tips for Scone Success: Mastering the Art
- Don't Overmix: Overmixing develops the gluten in the flour, resulting in tough scones. Mix just until the ingredients are combined.
- Cold Ingredients: Use cold butter and cold cream for the flakiest scones.
- Proper Baking Time: Keep a close eye on your scones while they bake. Overbaking will result in dry scones.
- Variations: Get creative! Add other fruits, nuts, or spices to customize your scones.
Beyond the Bake: Serving Suggestions and Storage
These cherry scones are delightful on their own, but they're even better with a dollop of clotted cream and a spoonful of your favorite jam. Serve them warm for the ultimate treat! Leftover scones can be stored in an airtight container at room temperature for up to 3 days or frozen for longer storage.
This comprehensive guide provides you with all the tools to create irresistible cherry scones. Now, go forth and bake! We'd love to hear about your baking adventures – share your photos and experiences in the comments below!

