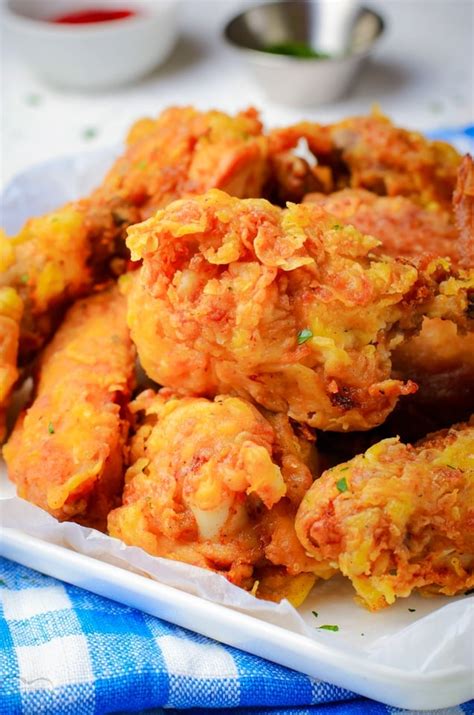
Crispy Fried Chicken Recipe (No Buttermilk Needed!)
Forget the buttermilk! This recipe delivers incredibly crispy, juicy fried chicken without the need for a lengthy buttermilk soak. Perfect for busy weeknights or when you simply don't have buttermilk on hand.
Why This Recipe Works (Without Buttermilk!)
Many fried chicken recipes rely on buttermilk to tenderize and add flavor. Buttermilk's acidity helps break down the chicken's proteins, resulting in a more tender final product. However, we achieve similar results using a simple brine and a clever breading technique. This method ensures a flavorful, juicy interior and an irresistibly crispy exterior.
Key to Success: The Brine
The secret to juicy, flavorful fried chicken lies in the brine. Our brine solution uses common pantry staples to tenderize and season the chicken deeply.
Ingredients for the Brine:
- 4 cups water
- 1/4 cup kosher salt
- 2 tablespoons granulated sugar
- 1 tablespoon black peppercorns
- 2 bay leaves
- 1 teaspoon garlic powder
- 1 teaspoon onion powder
Instructions for Brining:
- Combine: In a large saucepan, combine all brine ingredients. Bring to a simmer over medium heat, stirring until salt and sugar dissolve.
- Cool: Remove from heat and let the brine cool completely before using.
- Submerge: Place chicken pieces (about 2 lbs bone-in, skin-on chicken thighs and drumsticks) in a large zip-top bag or a container large enough to hold the chicken and the brine. Pour the cooled brine over the chicken, ensuring it's fully submerged.
- Refrigerate: Refrigerate for at least 4 hours, or preferably overnight. The longer the chicken brines, the more tender and flavorful it will become.
The Perfect Crispy Breadcrumb Coating
Achieving that extra-crispy exterior is crucial. This recipe uses a double-dredging method for maximum crunch.
Ingredients for Breading:
- 2 cups all-purpose flour
- 2 teaspoons paprika
- 1 teaspoon garlic powder
- 1 teaspoon onion powder
- 1 teaspoon salt
- 1/2 teaspoon black pepper
- 2 large eggs, beaten
- 2 cups panko bread crumbs
Instructions for Breading:
- Prepare the flour mixture: In a shallow dish, combine the flour, paprika, garlic powder, onion powder, salt, and pepper.
- Coat in flour: Remove chicken from the brine and pat dry with paper towels. This is essential for a crispy crust. Dredge each piece of chicken in the flour mixture, ensuring it's fully coated. Shake off any excess flour.
- Dip in egg: Dip each floured chicken piece into the beaten eggs, allowing excess egg to drip off.
- Coat in panko: Press the chicken firmly into the panko bread crumbs, ensuring a complete coating. Gently shake off any loose crumbs.
- Rest: Let the breaded chicken rest for at least 15 minutes before frying. This allows the breading to adhere better and helps prevent it from falling off during frying.
Frying to Perfection
Ingredients for Frying:
- Vegetable oil or peanut oil, enough to fill a large, heavy-bottomed pot about 3 inches deep.
Instructions for Frying:
- Heat the oil: Heat the oil to 350°F (175°C). Use a thermometer to monitor the oil temperature accurately. Maintaining consistent temperature is crucial for even cooking.
- Fry in batches: Carefully place the chicken pieces into the hot oil, ensuring not to overcrowd the pot. Overcrowding will lower the oil temperature and result in greasy chicken. Fry for about 8-10 minutes per side, or until golden brown and cooked through (internal temperature should reach 165°F or 74°C).
- Drain: Remove the chicken from the oil and place it on a wire rack set over a baking sheet to drain excess oil.
- Rest: Let the chicken rest for at least 5 minutes before serving. This allows the juices to redistribute, resulting in more tender and flavorful chicken.
Serving Suggestions
Serve your crispy fried chicken with your favorite sides – classic coleslaw, mashed potatoes, or creamy mac and cheese are all excellent choices.
Pro-Tip: For extra crispy skin, you can broil the fried chicken for a minute or two after frying to further crisp up the exterior. Keep a close eye on it to prevent burning.
Enjoy your delicious, homemade, buttermilk-free fried chicken! Remember to share your culinary creations using #friedchicken #crispychicken #buttermilkfree on social media. Let's connect and inspire each other!

