Gluten-Free Lemon Bars Recipe: A Zesty Delight
Are you craving a tangy treat that's also gluten-free? Look no further! This recipe for gluten-free lemon bars delivers the perfect balance of sweet and tart, with a buttery, crumbly crust and a vibrant, lemony filling. Perfect for any occasion, these bars are sure to be a crowd-pleaser, even for those with gluten sensitivities.
Ingredients:
This recipe is broken down into two parts: the crust and the lemon filling.
For the Gluten-Free Crust:
- 1 ½ cups gluten-free all-purpose flour blend (ensure it contains xanthan gum)
- ½ cup powdered sugar
- ½ teaspoon salt
- ½ cup (1 stick) unsalted butter, chilled and cubed
For the Lemon Filling:
- 4 large eggs
- 1 ½ cups granulated sugar
- ½ cup fresh lemon juice (about 3-4 lemons)
- 2 tablespoons lemon zest
- ¼ cup gluten-free all-purpose flour blend (ensure it contains xanthan gum)
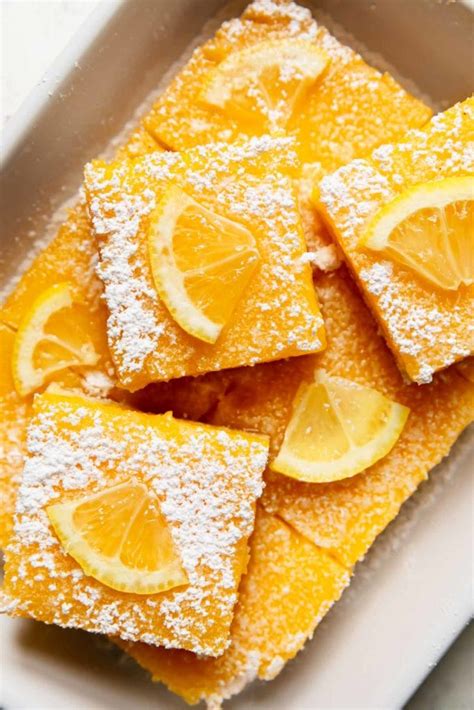
- Powdered sugar (for dusting, optional)
Instructions:
Making the Gluten-Free Crust:
- Preheat & Prepare: Preheat your oven to 350°F (175°C). Grease and flour an 8x8 inch baking pan. Using gluten-free flour ensures the pan is properly prepared for the crust.
- Combine Dry Ingredients: In a medium bowl, whisk together the gluten-free flour, powdered sugar, and salt.
- Cut in Butter: Add the chilled, cubed butter to the dry ingredients. Use a pastry blender or your fingers to cut the butter into the flour mixture until it resembles coarse crumbs.
- Press into Pan: Press the crumb mixture firmly and evenly into the prepared baking pan. Create an even layer to ensure consistent baking.
- Partial Bake: Bake for 15-20 minutes, or until the crust is lightly golden. This pre-baking step helps prevent a soggy bottom.
Making the Lemon Filling:
- Whisk Ingredients: In a large bowl, whisk together the eggs and granulated sugar until light and fluffy.
- Add Lemon: Stir in the lemon juice, lemon zest, and gluten-free flour until well combined. Be sure to thoroughly incorporate the flour to prevent lumps.
- Pour & Bake: Pour the lemon filling over the partially baked crust.
- Bake Completely: Bake for another 20-25 minutes, or until the filling is set and no longer jiggles in the center.
- Cool Completely: Let the lemon bars cool completely in the pan before cutting into squares. This allows the filling to set properly and prevents crumbling.
Tips for Success:
- Use a Good Gluten-Free Flour Blend: The success of these gluten-free lemon bars hinges on using a high-quality gluten-free all-purpose flour blend that contains xanthan gum. Xanthan gum helps to bind the ingredients and create a better texture.
- Don't Overbake: Overbaking can result in dry, crumbly lemon bars. Keep a close eye on them during baking.
- Cool Completely: Patience is key! Allowing the bars to cool completely before cutting will prevent them from crumbling and will ensure a cleaner cut.
- Dust with Powdered Sugar (Optional): A light dusting of powdered sugar adds a touch of elegance and sweetness.
Serving Suggestions:
These gluten-free lemon bars are delicious on their own, but you can also enhance them with a dollop of whipped cream, a scoop of vanilla ice cream, or a sprinkle of fresh berries.
Keyword Optimization:
This recipe is optimized for keywords such as: gluten-free lemon bars, gluten-free lemon bar recipe, easy gluten-free lemon bars, best gluten-free lemon bars recipe, lemon bars gluten-free, easy lemon bar recipe gluten-free. The content naturally incorporates these keywords and related terms throughout the article, enhancing search engine visibility.
This detailed recipe, complete with SEO optimization, is sure to attract a wide audience searching for delicious and accessible gluten-free desserts. Remember to share this recipe with your friends and family!

