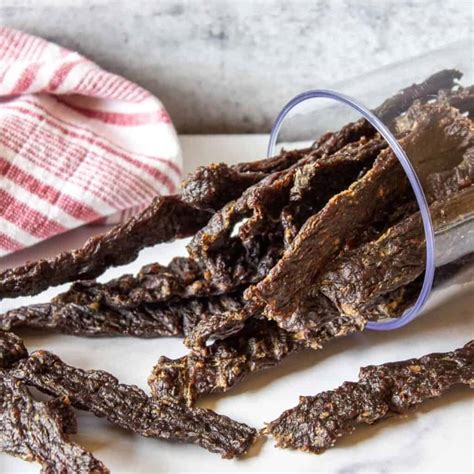
The Ultimate Guide to Making Delicious Ground Venison Jerky
Making your own jerky is a rewarding experience, offering a delicious, high-protein snack perfect for hiking, camping, or just enjoying at home. This guide focuses on creating ground venison jerky, a fantastic alternative to traditional sliced jerky, offering a unique texture and flavor profile. We'll cover everything from selecting the best meat to mastering the drying process, ensuring you produce a batch of jerky you'll be proud of.
Choosing Your Venison
The quality of your starting ingredients directly impacts the final product. Opt for lean ground venison with a low fat content. Excess fat can lead to a greasy, less appealing jerky. Ideally, you should aim for venison with a fat content of less than 20%. Freshly ground is best, but you can use frozen, ensuring it's completely thawed before proceeding.
Ingredients for Ground Venison Jerky
This recipe provides a flavorful base; feel free to experiment with your preferred spices!
- 1 lb lean ground venison
- 1/2 cup soy sauce (or coconut aminos for a gluten-free option)
- 1/4 cup Worcestershire sauce
- 2 tablespoons brown sugar (or your preferred sweetener)
- 1 tablespoon garlic powder
- 1 tablespoon onion powder
- 1 teaspoon black pepper
- 1 teaspoon smoked paprika
- 1/2 teaspoon cayenne pepper (optional, for added heat)
Preparing the Venison Jerky Mixture
-
Combine Ingredients: In a large bowl, thoroughly combine the ground venison with all the other ingredients. Ensure the meat is evenly coated with the marinade. Use your hands to thoroughly mix everything together, breaking up any large clumps of meat. This step is crucial for even cooking and flavor distribution.
-
Marination Time: Cover the bowl and refrigerate for at least 4 hours, or preferably overnight. This allows the venison to fully absorb the flavors, resulting in a more intense and delicious jerky.
Drying Your Ground Venison Jerky
There are several methods for drying ground venison jerky:
Dehydrator Method:
This is the most recommended method for consistent results.
- Prepare the Dehydrator: Preheat your dehydrator to 135-160°F (57-71°C). Lower temperatures ensure a longer drying time but result in a chewier jerky.
- Spread the Mixture: Spread the marinated ground venison mixture evenly onto the dehydrator trays. Avoid overcrowding the trays, as this can prevent proper air circulation and lead to uneven drying. Aim for a thin, even layer.
- Drying Time: The drying time varies depending on your dehydrator and the thickness of your jerky. It typically takes 6-12 hours, or until the jerky is completely dry and firm to the touch.
Oven Method:
This method requires more attention but can be used if you don't have a dehydrator.
- Prepare Your Oven: Preheat your oven to the lowest setting possible, ideally around 170°F (77°C). Leave the oven door slightly ajar to allow moisture to escape. Line a baking sheet with parchment paper.
- Spread and Dry: Spread the mixture thinly onto the baking sheet. Bake for several hours, checking frequently and rotating the sheet to ensure even drying. This method requires closer monitoring to prevent burning. It can take significantly longer than the dehydrator method.
Storage and Enjoyment
Once your ground venison jerky is completely dry, let it cool completely. Store it in an airtight container in a cool, dark, and dry place. Properly stored, your jerky should last for several weeks.
Tips for the Best Ground Venison Jerky
- Don't over-season: Start with the recipe as a guide and adjust seasonings to your taste. Too much salt can make your jerky tough.
- Experiment with flavors: Try adding different spices, such as chipotle powder, cumin, or coriander.
- Check for dryness: Use the "squeeze test" to determine if your jerky is completely dry. If it feels slightly pliable, it needs more drying time.
Making ground venison jerky is a fun and rewarding process. By following these steps and experimenting with flavors, you can create a delicious and healthy snack that you'll enjoy for weeks to come! Remember to always practice safe food handling techniques.

