Mary Berry's No-Bake Cheesecake: A Deliciously Easy Dessert
Mary Berry, the queen of baking, has graced our kitchens with countless delectable recipes. Among her most beloved creations is her effortless no-bake cheesecake. This recipe is perfect for those who crave a creamy, dreamy cheesecake without the fuss of baking. Let's dive into this simple yet elegant dessert!
Why This Recipe is a Winner
This no-bake cheesecake recipe is a lifesaver for several reasons:
- No oven required: Perfect for hot summer days or for those without an oven.
- Simple ingredients: Uses readily available ingredients, most likely already in your pantry.
- Quick and easy: Minimal preparation and chilling time makes this a perfect last-minute dessert.
- Deliciously rich and creamy: The texture is unbelievably smooth and satisfying.
- Adaptable: Easily customize with your favorite toppings and flavour variations.
Ingredients You'll Need
This recipe yields a delectable 8-12 serving cheesecake. Gather the following ingredients:
For the Base:
- 200g digestive biscuits
- 85g unsalted butter, melted
For the Filling:
- 500g full-fat cream cheese, softened
- 100g caster sugar
- 2 tsp vanilla extract
- 200ml double cream, whipped
- 2 tbsp lemon juice (optional, for a zesty twist)
- Fresh berries or chocolate shavings for garnish (optional)
Step-by-Step Instructions: Creating Mary Berry's Masterpiece
Follow these easy steps to recreate this iconic dessert:
1. Making the Base:
- Crush the biscuits: Finely crush the digestive biscuits using a food processor or by placing them in a strong plastic bag and crushing with a rolling pin.
- Combine with butter: Add the melted butter to the crushed biscuits and mix well until evenly moistened.
- Press into a tin: Press the mixture firmly into the base of a 20cm springform tin. Use the back of a spoon to create an even layer.
- Chill: Refrigerate the base for at least 30 minutes to firm up.
2. Preparing the Filling:
- Beat the cream cheese: In a large bowl, beat the softened cream cheese and caster sugar together until smooth and creamy. You can use an electric mixer for this step.
- Add flavor: Stir in the vanilla extract and lemon juice (if using).
- Fold in whipped cream: Gently fold in the whipped double cream until just combined. Be careful not to overmix.
- Pour over base: Pour the creamy mixture over the chilled biscuit base and spread evenly.
3. Chilling and Serving:
- Chill: Refrigerate the cheesecake for at least 4 hours, or preferably overnight, to allow it to set completely.
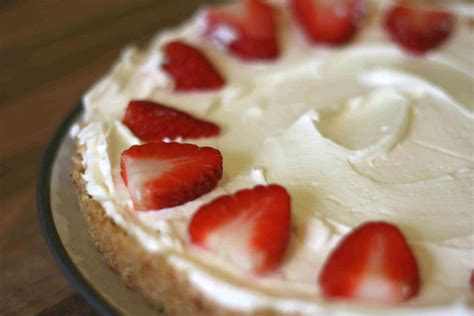
- Release and garnish: Carefully release the cheesecake from the springform tin. Garnish with fresh berries, chocolate shavings, or any other desired toppings.
- Serve and enjoy: Slice and serve this delightful dessert – it's best enjoyed chilled!
Tips for Success
- Softened cream cheese is key: Ensure your cream cheese is properly softened to avoid lumps in the filling.
- Don't overmix the filling: Overmixing can lead to a less creamy texture.
- Chill thoroughly: Allowing the cheesecake to chill completely ensures a firm and set consistency.
- Get creative with toppings: Experiment with different fruits, chocolate, or nuts to personalize your cheesecake.
Variations and Tweaks
This recipe is incredibly versatile! Here are a few ideas to put your own spin on Mary Berry's masterpiece:
- Chocolate Cheesecake: Add melted dark chocolate to the filling for a rich chocolate flavor.
- Berry Cheesecake: Fold in fresh berries, such as raspberries or blueberries, into the filling.
- Coffee Cheesecake: Add instant coffee granules to the filling for a coffee-flavored cheesecake.
Mary Berry's No-Bake Cheesecake is a guaranteed crowd-pleaser. With its simple ingredients, easy instructions, and incredible taste, it’s a dessert that will impress even the most discerning palates. So, gather your ingredients and get ready to bake (well, not bake!) your way to a delicious treat!

