The Ultimate Old-Fashioned Tea Loaf Recipe: A Classic Comfort Treat
The aroma of a freshly baked tea loaf – warm, spiced, and subtly sweet – is enough to transport anyone to a simpler time. This classic treat, perfect for afternoon tea or a cozy evening in, is surprisingly easy to make. This recipe focuses on achieving that authentic, old-fashioned taste, using simple, high-quality ingredients. Let's dive into the details of crafting the perfect old-fashioned tea loaf.
Ingredients for Your Perfect Loaf
This recipe yields one standard loaf (approximately 9x5 inches).
- 225g (2 cups) All-Purpose Flour: Provides the structure for your loaf. Using good quality flour will make a difference in the texture.
- 1 tsp Baking Powder: The leavening agent, giving your loaf its lovely rise.
- ½ tsp Baking Soda: Works in conjunction with the baking powder for a light and airy crumb.
- ¼ tsp Ground Nutmeg: A classic warming spice that adds depth to the flavor.
- ¼ tsp Ground Cinnamon: Another warming spice that complements the nutmeg beautifully.
- Pinch of Salt: Enhances the other flavors and balances the sweetness.
- 175g (¾ cup) Caster Sugar: Provides the necessary sweetness. You can adjust this to your preference.
- 175g (¾ cup) Unsalted Butter, softened: Ensures a tender crumb. Make sure your butter is truly soft, not melted.
- 2 Large Eggs: Bind the ingredients together and add richness.
- 175ml (¾ cup) Milk: Adds moisture and helps create a tender crumb. You can use whole milk, semi-skimmed, or even buttermilk for a tangier flavor.
- 1 tsp Vanilla Extract (optional): Enhances the overall flavor profile.
Step-by-Step Instructions: Baking Bliss
-
Preheat & Prepare: Preheat your oven to 180°C (160°C Fan/350°F/Gas Mark 4). Grease and flour your loaf tin thoroughly. This prevents sticking and ensures a clean release.
-
Dry Ingredients: In a large bowl, sift together the flour, baking powder, baking soda, nutmeg, cinnamon, and salt. Sifting is crucial for a light texture.
-
Cream Butter & Sugar: In a separate bowl, cream together the softened butter and caster sugar until light and fluffy. This is best done with an electric mixer, but can be achieved with a wooden spoon if you're feeling extra energetic!
-
Add Eggs: Beat in the eggs one at a time, mixing well after each addition. Scrape down the sides of the bowl to ensure everything is incorporated.
-
Combine Wet & Dry: Gradually add the dry ingredients to the wet ingredients, alternating with the milk, beginning and ending with the dry ingredients. Mix gently until just combined – avoid overmixing.
-
Vanilla (Optional): Stir in the vanilla extract if using.
-
Bake: Pour the batter into the prepared loaf tin and bake for 50-60 minutes, or until a skewer inserted into the center comes out clean.
-
Cool: Let the tea loaf cool in the tin for 10 minutes before transferring it to a wire rack to cool completely. This prevents it from becoming soggy.
Tips for Tea Loaf Perfection
- Room Temperature Ingredients: Using room temperature ingredients ensures even mixing and baking.
- Don't Overmix: Overmixing develops the gluten in the flour, resulting in a tough loaf.
- Check for Doneness: Use a skewer or toothpick to check if the loaf is baked through. If it comes out clean, it's ready.
- Storage: Store your tea loaf in an airtight container at room temperature for up to 3 days, or freeze for longer storage.
Serving Suggestions: Elevate Your Tea Time
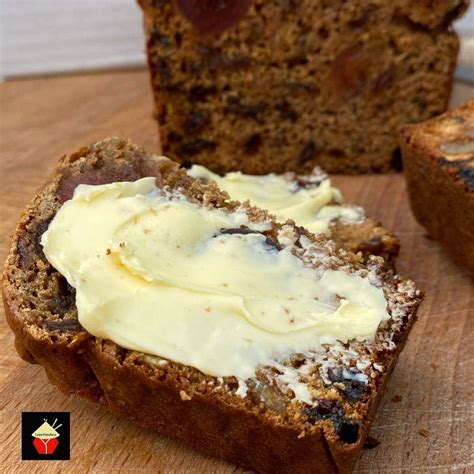
This old-fashioned tea loaf is delicious on its own, but you can also enhance it with:
- Butter: A classic pairing for a simple yet satisfying treat.
- Jam: Strawberry, raspberry, or apricot jam complement the spice beautifully.
- Cream Cheese: A dollop of cream cheese adds a tangy contrast.
This recipe provides a foundation for you to experiment and create your own perfect old-fashioned tea loaf. Enjoy the process and the delicious results! Remember to share your baking adventures – we'd love to see your creations!

