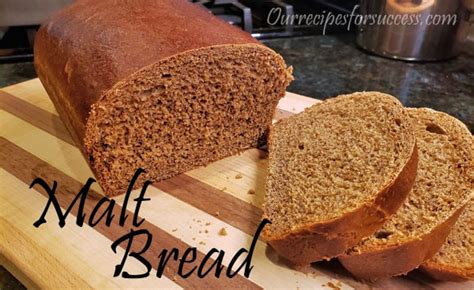
The Ultimate Guide to Baking Delicious Malt Bread
Malt bread, with its distinctive rich flavor and slightly sweet taste, is a delightful treat for bread lovers. This comprehensive guide provides you with a foolproof recipe and helpful tips to achieve perfectly baked malt bread every time. We'll cover everything from ingredient selection to baking techniques, ensuring your loaf is a culinary masterpiece.
Understanding the Magic of Malt
Before we dive into the recipe, let's understand what makes malt bread so special. Malt extract, the key ingredient, adds a complex sweetness and a deep, nutty flavor that elevates this bread above ordinary loaves. It also contributes to a beautiful, rich brown crust and a soft, tender crumb. Different types of malt extract exist (e.g., light, medium, dark), each impacting the final flavor profile. Experiment to find your favorite!
Ingredients for Your Malt Bread Masterpiece
This recipe yields one large loaf. Adjust quantities as needed.
- 1 cup warm water (105-115°F): The temperature is crucial for activating the yeast.
- 2 ¼ teaspoons active dry yeast: Check the expiration date to ensure freshness.
- 2 tablespoons malt extract: Choose your preferred type – light malt extract provides a subtle sweetness, while darker varieties offer a more intense flavor.
- 1 tablespoon granulated sugar: Enhances yeast activity and adds to the overall sweetness.
- 1 teaspoon salt: Balances the sweetness and enhances the flavor.
- 4 cups all-purpose flour, plus more for dusting: You may need slightly more or less depending on your flour and humidity.
- ¼ cup vegetable oil: Adds moisture and tenderness to the crumb.
- 1 large egg, lightly beaten: Adds richness and improves the crust's color and texture.
Step-by-Step Baking Instructions: A Malt Bread Journey
Step 1: Activating the Yeast
In a large bowl, combine the warm water, yeast, and sugar. Let stand for 5-10 minutes until foamy. This confirms your yeast is alive and ready to work its magic!
Step 2: Combining Wet and Dry Ingredients
Add the malt extract, salt, oil, and beaten egg to the yeast mixture. Stir well to combine.
Step 3: Incorporating the Flour
Gradually add the flour, one cup at a time, mixing with a wooden spoon or your hands until a shaggy dough forms.
Step 4: Kneading the Dough
Turn the dough out onto a lightly floured surface and knead for 5-7 minutes, or until the dough becomes smooth and elastic. If the dough is too sticky, add a little more flour, a tablespoon at a time.
Step 5: First Rise (Bulk Fermentation)
Place the dough in a lightly oiled bowl, turning to coat. Cover with plastic wrap and let rise in a warm place for 1-1.5 hours, or until doubled in size.
Step 6: Shaping the Loaf
Punch down the dough to release the air. Shape it into a loaf and place it in a greased 9x5 inch loaf pan.
Step 7: Second Rise (Proofing)
Cover the loaf pan with plastic wrap and let rise for another 30-45 minutes, or until the dough almost reaches the top of the pan.
Step 8: Baking the Bread
Preheat your oven to 375°F (190°C). Bake the loaf for 30-35 minutes, or until golden brown and the internal temperature reaches 200°F (93°C).
Step 9: Cooling and Enjoying
Remove the bread from the oven and let it cool in the pan for 10 minutes before transferring it to a wire rack to cool completely. Slice and enjoy your homemade malt bread!
Tips for Malt Bread Perfection
- Flour Type: Experiment with different flour types like bread flour for a chewier loaf.
- Malt Extract Variations: Explore different malt extracts for unique flavor profiles.
- Oven Temperature: Monitor your oven's temperature closely, adjusting baking time as needed.
- Cooling: Allow the bread to cool completely before slicing to prevent a gummy texture.
Serving Suggestions: Beyond the Slice
Malt bread is incredibly versatile. Enjoy it toasted with butter, alongside soups and stews, or as part of a delicious sandwich. Its rich flavor pairs wonderfully with savory and sweet fillings alike.
This comprehensive guide empowers you to bake amazing malt bread. So, gather your ingredients, follow the steps, and savor the delightful aroma and taste of your homemade loaf! Remember to share your baking journey and delicious results with us!

