Mary Berry's Decadent Chocolate Cake: A Step-by-Step Guide
Mary Berry, a household name synonymous with baking excellence, has graced our kitchens with countless recipes. Among her most beloved creations is her rich and intensely chocolatey cake. This guide provides a detailed, SEO-optimized walkthrough of Mary Berry's chocolate cake recipe, ensuring you achieve baking perfection.
Understanding the Magic: Key Ingredients and Their Roles
Mary Berry's recipes are renowned for their simplicity and effectiveness. This chocolate cake is no exception. The success lies in the careful balance of ingredients:
- Butter: Provides richness and moisture, crucial for a tender crumb. Use good quality, softened butter for optimal results.
- Sugar: Adds sweetness and helps create a moist texture. Granulated sugar is best.
- Eggs: Bind the ingredients together and add richness. Ensure they're at room temperature for even incorporation.
- Flour: Provides structure to the cake. Plain (all-purpose) flour is recommended.
- Cocoa Powder: The star of the show! Use good quality cocoa powder for a deep, intense chocolate flavor. Unsweetened is preferred.
- Baking Powder: The leavening agent, ensuring the cake rises beautifully.
- Milk: Adds moisture and helps create a smooth batter.
- Vanilla Extract: Enhances the overall flavor profile, adding warmth and complexity.
Step-by-Step Baking Instructions: Achieving Mary Berry Perfection
This section meticulously details each step, ensuring even novice bakers can create this masterpiece.
Step 1: Preparing the Ingredients
Before you begin, ensure all your ingredients are at room temperature. This is crucial for proper emulsification and a smooth batter. Measure out all ingredients accurately using kitchen scales for the best results. Mary Berry emphasizes precision in her baking.
Step 2: Creaming the Butter and Sugar
In a large bowl, cream together the softened butter and sugar until light and fluffy. This step incorporates air into the mixture, contributing to a light and airy cake. Use an electric mixer for best results.
Step 3: Adding the Eggs
Gradually add the eggs one at a time, beating well after each addition. Ensure each egg is fully incorporated before adding the next.
Step 4: Combining the Dry Ingredients
In a separate bowl, sift together the flour, cocoa powder, and baking powder. This removes lumps and ensures even distribution throughout the batter.
Step 5: Incorporating the Dry and Wet Ingredients
Gradually add the dry ingredients to the wet ingredients, folding gently with a spatula until just combined. Overmixing can lead to a tough cake.
Step 6: Adding the Milk and Vanilla
Stir in the milk and vanilla extract until the batter is smooth and consistent.
Step 7: Baking the Cake
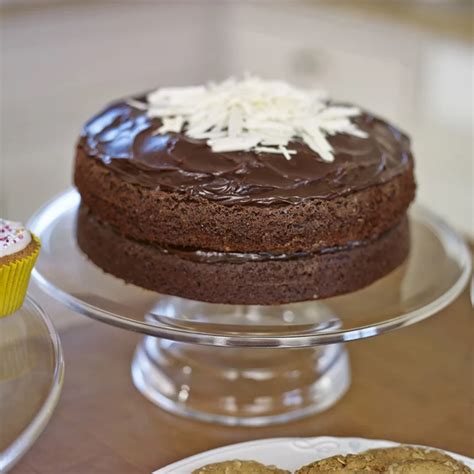
Pour the batter into a prepared baking tin (Mary Berry typically uses two 8-inch round tins). Bake in a preheated oven according to the specific recipe instructions (usually around 350°F/180°C). Check for doneness with a skewer – it should come out clean.
Step 8: Cooling and Serving
Once baked, allow the cake to cool in the tin for a few minutes before inverting it onto a wire rack to cool completely. Once cool, frost with your favorite chocolate buttercream or ganache. Enjoy!
Tips for Chocolate Cake Success: Mary Berry's Secrets
- Room Temperature Ingredients: This cannot be stressed enough!
- Accurate Measurements: Use kitchen scales for precision.
- Don't Overmix: Overmixing develops gluten, leading to a tough cake.
- Properly Preheat Oven: Ensure your oven is at the correct temperature before baking.
- Check for Doneness: Use a skewer to test for doneness.
Beyond the Basics: Variations and Enhancements
While Mary Berry's recipe is perfect as is, feel free to experiment:
- Add Nuts: Chopped walnuts or pecans add texture and flavor.
- Different Frosting: Try a cream cheese frosting or a chocolate ganache.
- Chocolate Chips: Fold in some chocolate chips for extra chocolatey goodness.
This comprehensive guide ensures you can confidently bake Mary Berry's delicious chocolate cake. Remember to follow the steps carefully and enjoy the process! Happy baking!

