Sourdough Discard Pizza Dough Recipe: A Delicious Way to Reduce Waste
Sourdough bread making is a rewarding but sometimes messy process. You're left with sourdough discard – that extra sourdough starter you don't use for your loaves. But don't despair! This isn't waste; it's a hidden treasure trove of flavor waiting to be unleashed in your pizza dough. This recipe utilizes your sourdough discard to create a crispy, flavorful pizza crust, reducing food waste and enhancing your culinary skills.
Why Use Sourdough Discard in Pizza Dough?
Using sourdough discard in your pizza dough offers several advantages:
- Reduces Food Waste: Instead of throwing away your extra starter, you're repurposing it, making your baking process more sustainable.
- Adds Flavor: The sourdough discard imparts a complex, tangy flavor to the pizza crust, elevating it beyond a basic recipe.
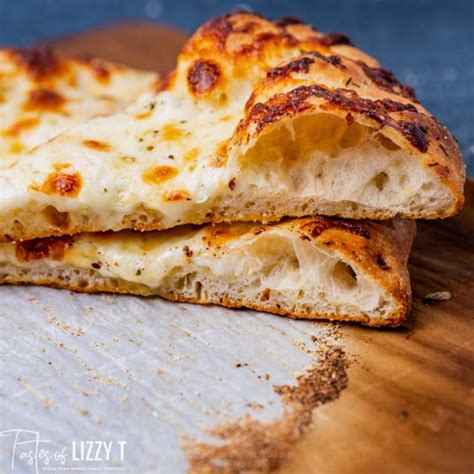
- Improves Texture: The natural acids in the discard contribute to a crispier, chewier crust.
Ingredients for Your Sourdough Discard Pizza Dough
This recipe makes enough dough for one 12-inch pizza. Feel free to double or triple it as needed.
- 1 cup (240g) active sourdough discard (fed 4-6 hours before)
- 1 cup (250ml) warm water (around 105-115°F)
- 1 teaspoon sugar
- 2 teaspoons salt
- 2 1/2 cups (300g) all-purpose flour, plus more for dusting
- 2 tablespoons olive oil
Instructions: Creating Your Delicious Pizza Crust
Step 1: Combining Ingredients
In a large bowl, combine the warm water, sugar, and sourdough discard. Stir well until the sugar is dissolved and the discard is fully incorporated. Let this mixture sit for about 15-20 minutes to activate the yeast.
Step 2: Adding Dry Ingredients
Add the salt and 2 cups of flour to the wet ingredients. Mix with a wooden spoon or your hands until a shaggy dough forms.
Step 3: Kneading the Dough
Turn the dough out onto a lightly floured surface and knead for 5-7 minutes, gradually adding the remaining ½ cup of flour until the dough becomes smooth and elastic. Add more flour if needed to prevent sticking. The dough should be slightly tacky but not overly sticky.
Step 4: First Rise
Lightly oil a large bowl. Place the dough in the bowl, turning to coat it with oil. Cover the bowl with plastic wrap and let the dough rise in a warm place for at least 1-2 hours, or until doubled in size. This allows the sourdough discard to further ferment and develop flavor.
Step 5: Shaping and Second Rise
Once the dough has risen, gently punch it down to release the air. Shape the dough into a round or rectangular shape, depending on your preferred pizza style. Place the shaped dough on a lightly floured pizza pan or baking sheet.
Let it rest for another 30 minutes to allow for a final proof. This second rise helps the crust develop its characteristic airy texture.
Step 6: Topping and Baking
Preheat your oven to 450°F (232°C). Add your favorite pizza sauce, cheese, and toppings.
Bake for 15-20 minutes, or until the crust is golden brown and the cheese is melted and bubbly.
Step 7: Enjoy!
Let the pizza cool slightly before slicing and serving.
Tips for the Perfect Sourdough Discard Pizza
- Active Discard: Ensure your sourdough discard is active and bubbly before using it. A fed starter will yield the best results.
- Flour Type: Experiment with different types of flour, such as bread flour or a blend of all-purpose and whole wheat flour, to adjust the texture and flavor of your crust.
- Hydration: Adjust the amount of water based on the consistency of your sourdough discard. You may need slightly more or less depending on its moisture content.
- Oven Temperature: A hot oven is crucial for a crispy crust. Consider using a pizza stone for an even crispier result.
This sourdough discard pizza dough recipe is a fantastic way to minimize food waste and create a delicious, flavorful pizza. Enjoy experimenting with different toppings and flour types to discover your perfect sourdough pizza! Remember to share your creations and tag us! Happy baking!

