The Ultimate Guide to Baking the Perfect Stottie Cake
The stottie cake, a beloved staple of North East England, is more than just bread; it's a culinary experience. This hearty, slightly sweet, and uniquely textured cake is perfect for breakfast, lunch, or a satisfying snack. This comprehensive guide will walk you through creating your own perfect stottie cake, from understanding the key ingredients to mastering the baking process.
Understanding the Stottie Cake: A Deep Dive
Before we delve into the recipe, let's appreciate what makes a stottie cake truly special. Unlike other breads, the stottie boasts a unique, slightly dense crumb and a characteristically thick, almost doughy texture. Its subtly sweet flavor profile allows it to be enjoyed on its own or as a base for a variety of fillings.
Key Characteristics of a Great Stottie:
- Texture: Dense, soft crumb with a slightly chewy exterior. Not too airy, not too heavy.
- Flavor: Subtly sweet, with a hint of sourdough tang (depending on your starter). A delicate, pleasant taste that doesn't overpower potential fillings.
- Shape: A round, flat cake, often slightly thicker in the center than at the edges.
The Recipe: Your Step-by-Step Guide to Stottie Cake Success
This recipe yields approximately two medium-sized stottie cakes.
Ingredients:
- 500g strong white bread flour (plus extra for dusting)
- 7g fast-action dried yeast (or 21g fresh yeast)
- 10g salt
- 300ml lukewarm water
- 1 tbsp sugar (optional, for a slightly sweeter cake)
- 1 tbsp olive oil (optional, for added richness)
Equipment:
- Large mixing bowl
- Measuring jugs and spoons
- Baking tray
- Plastic wrap or a clean tea towel
- Dough scraper (optional, but helpful)
- Sharp knife or dough cutter
Instructions:
-
Activate the Yeast: In the lukewarm water, dissolve the sugar (if using) and yeast. Let stand for 5-10 minutes until frothy. This ensures your yeast is active and ready to work its magic.
-
Combine Ingredients: In a large mixing bowl, combine the flour and salt. Add the activated yeast mixture and olive oil (if using).
-
Knead the Dough: Bring the dough together using your hands or a stand mixer with a dough hook. Knead for 8-10 minutes until the dough is smooth and elastic. If using a stand mixer, use a low speed to avoid overmixing.
-
First Rise: Place the dough in a lightly oiled bowl, cover with plastic wrap or a damp tea towel, and let it rise in a warm place for 1-1.5 hours, or until doubled in size.
-
Shape the Stotties: Gently punch down the dough to release the air. Divide the dough in half. On a lightly floured surface, roll each half into a roughly 8-inch circle.
-
Second Rise (Optional): Place the shaped stotties on a baking tray lined with baking paper. Cover loosely and let them rise for another 30 minutes. This step helps achieve a softer crumb.
-
Baking: Preheat your oven to 220°C (200°C fan/425°F/Gas Mark 7). Bake the stottie cakes for 20-25 minutes, or until they are golden brown and sound hollow when tapped on the bottom.
-
Cooling: Let the stottie cakes cool completely on a wire rack before slicing and serving.
Serving Suggestions:
The beauty of the stottie cake lies in its versatility. Enjoy it:
- Plain: Simply toasted with butter or jam.
- Filled: With bacon and egg, sausage, cheese, or your favorite fillings.
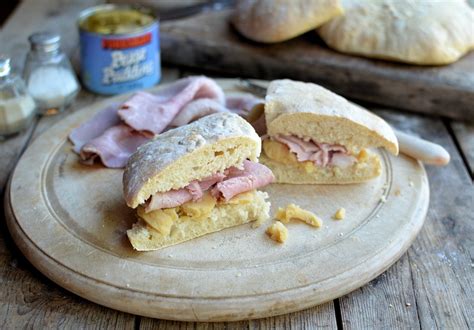
- As a Sandwich: Use it as the base for a hearty sandwich.
Tips for Stottie Cake Success:
- Flour: Use strong white bread flour for the best texture.
- Water Temperature: Ensure the water is lukewarm – not too hot, not too cold.
- Kneading: Proper kneading is crucial for developing the gluten and achieving the right texture.
- Rising Time: Allow sufficient time for the dough to rise. Rising times may vary depending on the ambient temperature.
Mastering the art of stottie cake baking takes practice, but the reward is a delicious and uniquely satisfying bread that's sure to become a family favorite. So, gather your ingredients, follow the steps, and enjoy the delightful aroma and taste of your homemade stottie cakes!

