Strawberry Jam Canning: A Sweet and Simple Guide
Making your own strawberry jam is a rewarding experience, resulting in a delicious spread perfect for toast, biscuits, or even as a filling for pastries. This comprehensive guide will walk you through a foolproof recipe for canning strawberry jam, ensuring safe and delicious results. We'll cover everything from selecting the perfect strawberries to safely preserving your homemade goodness.
Choosing the Right Strawberries
The key to amazing strawberry jam lies in using high-quality, ripe strawberries. Look for:
- Deep Red Color: The deeper the red, the more flavor and sweetness your jam will have.
- Firm Berries: Avoid overly soft or bruised strawberries, as these can lead to a less desirable texture.
- Fragrant Aroma: A strong, sweet strawberry aroma is a good indicator of ripeness and flavor.
Consider buying your strawberries locally from farmers' markets for the freshest and most flavorful options.
Ingredients for Strawberry Jam
This recipe yields approximately 6-8 half-pint jars of strawberry jam. Adjust quantities as needed.
- 4 cups crushed strawberries (approximately 4 pounds)
- 3 cups granulated sugar
- 1/4 cup lemon juice (freshly squeezed is best!)
- 1 pouch liquid pectin (such as Sure-Jell)
Equipment You'll Need
Before you begin, make sure you have all the necessary equipment:
- Large, heavy-bottomed pot: Choose a pot large enough to accommodate the strawberries and sugar without overflowing.
- Wooden spoon or spatula: For stirring the jam. Avoid metal utensils which can scratch your pot.
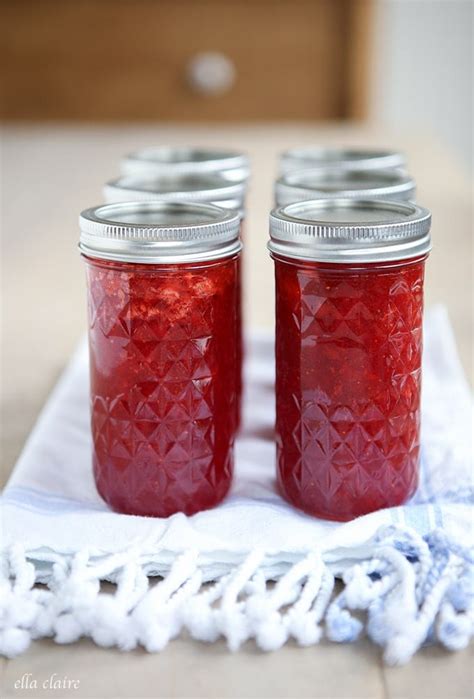
- Canning jars and lids: Half-pint jars are ideal for jam. Ensure your jars and lids are clean and sterilized. (Refer to your chosen brand's instructions for sterilization.)
- Jar lifter: To safely remove hot jars from the boiling water bath.
- Large pot for water bath canning: Large enough to comfortably hold your filled jars, with enough water to cover them by at least an inch.
- Ladle: For transferring the hot jam into the jars.
- Bubble remover: To remove air bubbles from the jars.
- Clean towels: For wiping jar rims.
Step-by-Step Guide to Canning Strawberry Jam
1. Prepare the Strawberries: Wash and hull the strawberries. Roughly crush them using a potato masher or by hand.
2. Combine Ingredients: In the large pot, combine the crushed strawberries, sugar, lemon juice, and liquid pectin. Stir well to ensure everything is thoroughly mixed.
3. Bring to a Full Rolling Boil: Over medium-high heat, bring the mixture to a full rolling boil that cannot be stirred down. This usually takes about 1-2 minutes. Maintain a strong boil for exactly one minute, stirring constantly.
4. Remove from Heat: Remove the pot from the heat. Skim off any foam that may have formed on the surface.
5. Fill Jars: Using a ladle, carefully fill the sterilized jars, leaving about ¼ inch headspace at the top. Wipe the rims of the jars clean with a damp cloth.
6. Seal Jars: Place the lids and rings on the jars, tightening them fingertip tight.
7. Process in a Water Bath: Place the filled jars in the water bath canner, ensuring they are covered by at least an inch of water. Bring the water to a rolling boil and process for 10 minutes (for half-pint jars). Add more boiling water if necessary to maintain the water level.
8. Remove and Cool: Carefully remove the jars from the canner using the jar lifter and place them on a towel-covered surface, leaving them undisturbed to cool completely. You should hear a "pop" sound as the jars seal.
9. Check Seals: After cooling, press down on the center of each lid. If the lid doesn't flex, the jar is sealed. If a lid flexes, refrigerate the jam and consume it within a few weeks.
10. Store: Once completely cooled and sealed, store your strawberry jam in a cool, dark, and dry place.
Tips for Success
- Use fresh, ripe strawberries for the best flavor.
- Sterilize your jars and lids properly. This is crucial for preventing spoilage.
- Follow the instructions for your specific pectin. Different brands may have slightly varying instructions.
- Be patient and don't rush the process. Proper canning techniques ensure the safety and longevity of your jam.
By following these steps, you'll be enjoying homemade strawberry jam that tastes far superior to anything you can buy in the store. Enjoy the fruits (and jam!) of your labor!

