Sweet Success: The Ultimate Guide to Making Cherry Preserves
Cherry season is a magical time! Bursting with juicy sweetness, cherries are perfect for pies, cobblers, and of course, delicious homemade preserves. This comprehensive guide will walk you through creating the perfect batch of cherry preserves, ensuring a taste of summer all year round. We'll cover everything from selecting the right cherries to mastering the canning process, so let's get started!
Choosing Your Cherries: The Foundation of Flavor
The quality of your cherries directly impacts the taste of your preserves. Look for firm, ripe cherries with vibrant color and no bruises or blemishes. Bing cherries are a popular choice for their rich, dark color and sweet flavor, but you can experiment with other varieties like Rainier or Balaton for a different taste profile. Aim for cherries that are slightly underripe, as they’ll soften during the cooking process. Avoid using overripe cherries, as they can result in mushy preserves.
Ingredients for Cherry Preserves: A Simple Recipe
This recipe yields approximately 6-8 half-pint jars of cherry preserves. Adjust quantities based on your needs.
- 4 pounds fresh cherries, pitted
- 4 cups sugar (granulated white sugar is recommended)
- 1 cup water
- 1/4 cup lemon juice (freshly squeezed is best)
- 1 (1-inch) piece of ginger, thinly sliced (optional, for a spicy kick)
Step-by-Step Guide to Making Cherry Preserves
This detailed guide ensures perfect cherry preserves every time.
1. Pitting the Cherries: Patience is Key
Pitting cherries can be time-consuming, but it's crucial for a smooth, enjoyable preserve. You can use a cherry pitter for efficiency or carefully pit them by hand. Ensure all pits are removed to prevent bitterness.
2. Combining Ingredients: A Symphony of Flavors
In a large, heavy-bottomed saucepan, combine the pitted cherries, sugar, water, lemon juice, and optional ginger. Stir gently to combine.
3. Simmering to Perfection: The Art of Patience
Bring the mixture to a boil over medium-high heat, stirring frequently to prevent sticking. Once boiling, reduce the heat to a simmer and cook for 15-20 minutes, or until the cherries have softened and the mixture has thickened slightly. Skim off any foam that rises to the surface.
4. Testing for Setting Point: The Jelly Test
The best way to ensure your preserves will set properly is the wrinkle test. Place a small amount of the hot preserve onto a chilled plate. Let it cool for a minute, then push it with your finger. If the surface wrinkles, it's ready. If not, continue simmering for a few more minutes and retest.
5. Canning Your Cherry Preserves: Safe & Secure Storage
Sterilize your jars and lids before beginning this step. This is crucial for safe preservation. Ladle the hot cherry preserves into the sterilized jars, leaving about ¼ inch headspace. Wipe the rims clean, place the lids and rings on tightly, and process in a boiling water bath for 10 minutes (adjust time based on your altitude - consult a reputable canning guide for specifics).
6. Cooling and Storage: Patience Yields Rewards
Remove the jars from the boiling water bath and let them cool completely. You should hear a satisfying "pop" sound as the jars seal. Check for proper sealing – any unsealed jars should be refrigerated and consumed within a week. Store sealed jars in a cool, dark, and dry place.
Tips for Perfect Cherry Preserves
- Use fresh, high-quality ingredients. This makes a huge difference in the final product.
- Don't overcook the preserves. Overcooked preserves can become mushy.
- Properly sterilize your jars and lids. This prevents spoilage and ensures safety.
- Follow canning instructions carefully. Improper canning can lead to spoilage.
- Label and date your jars. This helps you keep track of your preserves.
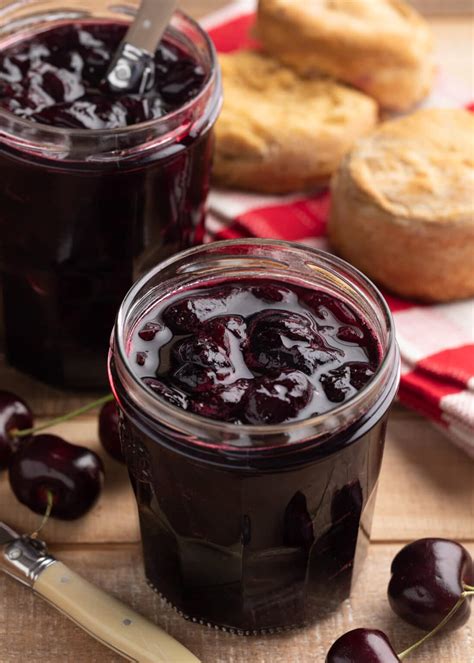
Enjoy your delicious homemade cherry preserves! They're perfect on toast, biscuits, or as a sweet treat on their own. Remember to share the delicious results of your hard work with friends and family. Happy preserving!

