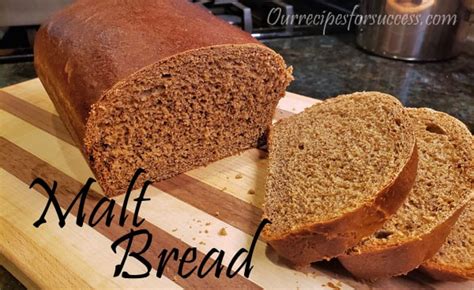
The Ultimate Guide to Baking Delicious Malt Bread
Malt bread, with its distinctive rich flavor and subtly sweet taste, is a delight for bread lovers. This comprehensive guide will walk you through a foolproof recipe, offering tips and tricks to achieve perfectly textured and wonderfully flavored malt bread every time. Get ready to elevate your baking game!
Understanding the Magic of Malt
Before we dive into the recipe, let's understand what makes malt bread so special. Malt extract, derived from germinated barley, adds a unique depth of flavor and a beautiful, deep brown color. It also contributes to the bread's soft texture and slightly chewy crumb. Different types of malt extract – light, medium, or dark – will yield varying levels of sweetness and color. Experiment to find your preference!
Ingredients for Your Perfect Malt Loaf
This recipe yields one large loaf of delicious malt bread. Adjust quantities as needed.
- 1 cup warm water (105-115°F): This temperature is crucial for activating the yeast.
- 2 ¼ teaspoons active dry yeast: Ensure your yeast is fresh for optimal results.
- 2 tablespoons unsalted butter, melted: Adds richness and flavor.
- ¼ cup granulated sugar: Balances the bitterness of the malt and promotes browning.
- 1 teaspoon salt: Enhances the overall flavor profile.
- 1 cup malt extract: Choose your preferred type (light, medium, or dark).
- 3 ½ - 4 cups all-purpose flour: You might need slightly more or less depending on the humidity.
- 1 large egg, lightly beaten: Adds richness and helps bind the dough.
- Optional additions: Consider adding raisins, cranberries, or nuts for extra texture and flavor.
Step-by-Step Malt Bread Recipe
1. Activate the Yeast: In a large bowl, combine warm water, yeast, and sugar. Let stand for 5-10 minutes until foamy. This indicates the yeast is active and ready to work its magic.
2. Combine Wet Ingredients: Add melted butter, malt extract, and beaten egg to the yeast mixture. Stir well to combine.
3. Incorporate Dry Ingredients: Gradually add flour, one cup at a time, mixing until a shaggy dough forms. Don't add all the flour at once; you might not need it all.
4. Knead the Dough: Turn the dough out onto a lightly floured surface and knead for 5-7 minutes until smooth and elastic. If using a stand mixer, knead with the dough hook attachment for the same amount of time.
5. First Rise (Bulk Fermentation): Place the dough in a lightly oiled bowl, turning to coat. Cover with plastic wrap and let rise in a warm place for 1-1.5 hours, or until doubled in size.
6. Shape the Loaf: Punch down the dough to release the air. Shape it into a loaf and place it in a greased 9x5 inch loaf pan.
7. Second Rise (Proofing): Cover the loaf pan with plastic wrap and let rise for another 30-45 minutes, or until almost doubled in size.
8. Bake the Bread: Preheat your oven to 375°F (190°C). Bake for 30-35 minutes, or until golden brown and the internal temperature reaches 200°F (93°C). Use a bread thermometer for accuracy.
9. Cool and Enjoy: Remove the bread from the oven and let it cool in the pan for 10 minutes before transferring it to a wire rack to cool completely. Slice and enjoy your delicious homemade malt bread!
Tips for Malt Bread Success
- Fresh Yeast is Key: Using fresh yeast ensures proper rising.
- Don't Over-Knead: Over-kneading can result in a tough loaf.
- Proper Rising Time: Allow sufficient time for both rises to achieve optimal texture.
- Internal Temperature: Use a bread thermometer to ensure the bread is fully baked.
- Cooling is Crucial: Allow the bread to cool completely before slicing to prevent a gummy texture.
Serving Suggestions
Enjoy your malt bread on its own, toasted with butter, or as part of a delicious sandwich. It pairs beautifully with soups, stews, and cheeses. Experiment and find your favorite way to savor this delightful bread!
This comprehensive guide provides all the essential information and a detailed recipe for baking perfect malt bread. Happy baking!

