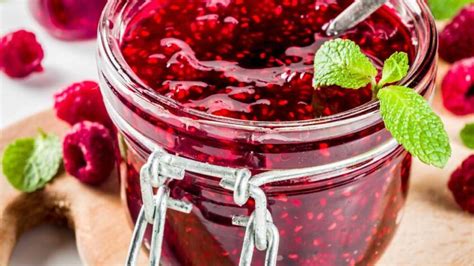
Mary Berry's Raspberry Jam Recipe: A Classic, Simplified
Mary Berry, a household name synonymous with baking excellence, offers a simple yet incredibly delicious raspberry jam recipe. This guide provides a step-by-step walkthrough, ensuring your homemade raspberry jam is a perfect balance of sweet and tart, achieving that signature Mary Berry quality. We'll also explore some SEO tips to help you share your jam-making success online!
Ingredients for Mary Berry's Raspberry Jam:
This recipe is designed for a manageable batch, perfect for first-timers or those with smaller jars. You can easily double or triple it depending on your needs.
- 1kg ripe raspberries: Choose raspberries that are plump and juicy, but not overripe. Overripe raspberries can lead to a less set jam.
- 1kg granulated sugar: Use caster sugar for a smoother texture, but granulated works perfectly fine.
- 1 lemon, juiced: The lemon juice is crucial for setting the jam and adding a touch of brightness.
Step-by-Step Instructions:
Preparing the Raspberries:
- Gentle Washing: Gently wash your raspberries under cool running water. Avoid over-washing, as this can bruise the delicate fruit.
- Hulling (Optional): While not strictly necessary for Mary Berry's method, you can remove the green caps (hulls) from the raspberries for a cleaner final product. This is a matter of personal preference.
Making the Jam:
- Combining Ingredients: In a large, heavy-bottomed saucepan, combine the raspberries, sugar, and lemon juice. Stir gently to combine.
- Gentle Heating: Place the saucepan over medium heat. Stir occasionally until the sugar dissolves completely and the mixture starts to simmer.
- Boiling and Setting: Bring the mixture to a rolling boil, stirring frequently to prevent sticking. Once boiling, maintain a rolling boil for about 10 minutes, or until the setting point is reached.
- Checking for Setting Point (Wrinkle Test): The classic wrinkle test is a reliable method. Place a small amount of jam onto a chilled saucer. After a minute, push the jam with your finger. If the surface wrinkles, your jam is ready.
- Removing from Heat: Once the setting point is reached, remove the pan from the heat.
Jarring and Storing:
- Sterilizing Jars: It's crucial to sterilize your jars and lids before filling them. This prevents spoilage and ensures a longer shelf life. You can do this by washing them thoroughly in hot, soapy water, then rinsing and drying completely.
- Filling the Jars: Carefully ladle the hot jam into the sterilized jars, leaving a small gap at the top.
- Sealing: Secure the lids tightly onto the jars.
- Cooling: Allow the jars to cool completely. You should hear a "pop" as the jars seal.
Tips for Success:
- Use a heavy-bottomed pan: This prevents burning and ensures even cooking.
- Don't overcook: Overcooked jam can become too thick and lose its vibrant color.
- Proper sterilization is key: This is crucial for preventing mold and ensuring a long shelf life.
SEO Optimization Tips for Your Jam-Making Blog Post:
- Keyword Research: Use tools like Google Keyword Planner to identify relevant keywords like "raspberry jam recipe," "Mary Berry jam," "homemade raspberry jam," and "easy raspberry jam recipe."
- On-Page Optimization: Naturally incorporate your keywords throughout your title, headings, and body text.
- Image Optimization: Use high-quality images of your jam-making process, optimizing alt text with relevant keywords.
- Internal and External Linking: Link to other relevant blog posts on your site and authoritative sources on jam making.
- Social Media Promotion: Share your post on social media platforms to increase visibility.
This detailed guide, combined with effective SEO strategies, will ensure your blog post on Mary Berry's raspberry jam recipe reaches a wide audience and establishes your online presence as a culinary expert! Remember to adapt and expand on this framework to showcase your own voice and style. Happy Jam Making!

