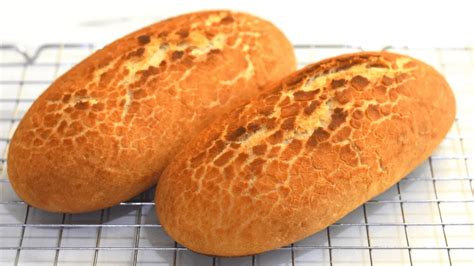
The Ultimate Guide to Baking the Perfect Tiger Loaf: A Deliciously Marbled Recipe
Tiger bread, with its striking tiger-striped appearance and soft, chewy crumb, is a true showstopper. This detailed guide will walk you through creating the perfect Tiger Loaf, from understanding the key ingredients to mastering the distinctive marbling technique. Get ready to impress your friends and family with this visually appealing and incredibly tasty bread!
Understanding the Tiger Loaf Magic: Key Ingredients and Their Roles
The characteristic tiger stripes in this bread aren't achieved through magic, but through a clever combination of ingredients and techniques. Let's break down the essential components:
1. Flour: The Foundation of Your Loaf
High-protein bread flour is crucial for developing the strong gluten network needed for that signature chewy texture. This allows the bread to rise properly and hold its shape. Don't substitute all-purpose flour; the results will be significantly different.
2. Yeast: The Rising Star
Active dry yeast or instant yeast will work perfectly. Ensure your yeast is fresh for optimal rising power. Check the expiration date and follow package instructions for activation.
3. Water: The Binding Agent
Lukewarm water activates the yeast and hydrates the flour, creating the dough's structure. The temperature is key – too hot, and you'll kill the yeast; too cold, and it won't activate effectively.
4. Sugar: Food for the Yeast
A small amount of sugar provides food for the yeast, promoting faster and more robust fermentation. Don't overdo it, as excessive sugar can inhibit yeast activity.
5. Salt: Flavor and Structure
Salt balances the sweetness, enhances the flavor of the bread, and controls the yeast's activity, preventing it from rising too quickly.
6. Butter (Optional): For Richness
Adding a touch of softened butter adds richness and flavor to the final product. While optional, it significantly enhances the overall taste experience.
Mastering the Marbling Technique: Creating Those Stunning Stripes
The key to a beautiful tiger loaf lies in the marbling technique. Here's how to achieve those iconic stripes:
1. Prepare Two Doughs: The Base and the Accent
You'll create two doughs: one plain, and one with added ingredients for contrast. The plain dough forms the base, while the second dough, often with cocoa powder or a similar ingredient, forms the striking stripes.
2. Gentle Folding: Creating the Pattern
Once both doughs have been kneaded separately, gently fold them together, avoiding excessive mixing. The goal is to create distinct swirls and patterns rather than a fully homogenous dough.
3. Shaping and Rising: The Final Steps
Shape the dough into a loaf and allow it to rise until doubled in size. This is crucial for achieving a light and airy texture.
Tiger Loaf Recipe: A Step-by-Step Guide
This recipe uses cocoa powder to create the dark stripes. Feel free to experiment with other ingredients like activated charcoal for a darker effect, or even chopped herbs for a savory twist.
Yields: 1 loaf Prep time: 20 minutes Rise time: 1-1.5 hours Bake time: 30-35 minutes
Ingredients:
- For the Light Dough:
- 250g bread flour
- 125ml lukewarm water
- 5g active dry yeast
- 5g sugar
- 5g salt
- For the Dark Dough:
- 125g bread flour
- 60ml lukewarm water
- 2.5g active dry yeast
- 2.5g sugar
- 2.5g salt
- 1 tbsp cocoa powder
Instructions:
- Activate Yeast: In separate bowls, combine the yeast, sugar, and lukewarm water for both doughs. Let stand for 5-10 minutes until foamy.
- Combine Ingredients: Add the flour and salt to each bowl and mix until a shaggy dough forms.
- Knead the Doughs: Knead each dough separately for 5-7 minutes until smooth and elastic.
- First Rise: Place each dough in lightly oiled bowls, cover, and let rise for about 30 minutes.
- Combine Doughs: Gently fold the light and dark doughs together, being careful not to overmix.
- Shape and Rise: Shape the combined dough into a loaf, place it in a greased loaf pan, cover, and let rise for another 45-60 minutes until doubled in size.
- Bake: Bake in a preheated oven at 375°F (190°C) for 30-35 minutes, or until golden brown and the internal temperature reaches 200°F (93°C).
- Cool: Let the bread cool completely on a wire rack before slicing and serving.
Tips for Tiger Loaf Success
- Don't overmix the doughs: Overmixing will result in a less distinct marbling effect.
- Use fresh ingredients: Fresh yeast and flour are key to a successful bake.
- Check for doneness: Use a bread thermometer to ensure the loaf is fully baked.
Beyond the Basics: Experimenting with Flavors
The beauty of this recipe lies in its adaptability. Experiment with different flavor combinations:
- Rosemary and Sea Salt Tiger Loaf: Add chopped rosemary to one of the doughs.
- Cinnamon Swirl Tiger Loaf: Incorporate cinnamon into one of the doughs.
- Sun-dried Tomato and Basil Tiger Loaf: Add sun-dried tomatoes and chopped basil to one of the doughs.
This comprehensive guide will empower you to bake stunning and delicious Tiger Loaves time and time again. Enjoy the process, and savor the results!

