Creamy Dreamy Banana Pudding with Condensed Milk: A Classic Recipe
Banana pudding is a beloved dessert, and this recipe, using the richness of condensed milk, elevates it to a whole new level of creamy deliciousness. This guide will walk you through creating this classic treat, optimizing it for both taste and search engine visibility. We'll cover everything from ingredient selection to serving suggestions, ensuring your banana pudding recipe ranks high in search results.
Ingredients for the Perfect Banana Pudding
This recipe uses readily available ingredients, ensuring ease of preparation. The key is the balance of sweetness and creaminess, achieved perfectly with sweetened condensed milk.
-
For the Pudding:
- 1 (14 ounce) can sweetened condensed milk
- 2 cups milk
- 1/4 cup cornstarch
- 1/4 teaspoon salt
- 2 large eggs
- 2 teaspoons vanilla extract
-
For the Assembly:
- 1 pound Nabisco Nilla Wafers or similar vanilla wafers
- 4-6 ripe bananas, sliced
- 1 cup heavy cream, whipped (optional, but highly recommended!)
Step-by-Step Instructions: Making Your Dreamy Banana Pudding
Follow these simple steps to create a truly unforgettable banana pudding. Each step is crucial to achieving that perfect texture and flavor.
Step 1: Preparing the Creamy Pudding Base
- In a medium saucepan, whisk together the condensed milk, milk, cornstarch, and salt until smooth.
- In a separate bowl, whisk the eggs until light and frothy. Gradually whisk a small amount of the milk mixture into the eggs to temper them, preventing scrambling.
- Pour the tempered egg mixture into the saucepan with the remaining milk mixture.
- Cook over medium heat, stirring constantly, until the pudding thickens and comes to a boil. This takes about 5-7 minutes. Be diligent in stirring to prevent lumps.
- Remove from heat and stir in the vanilla extract.
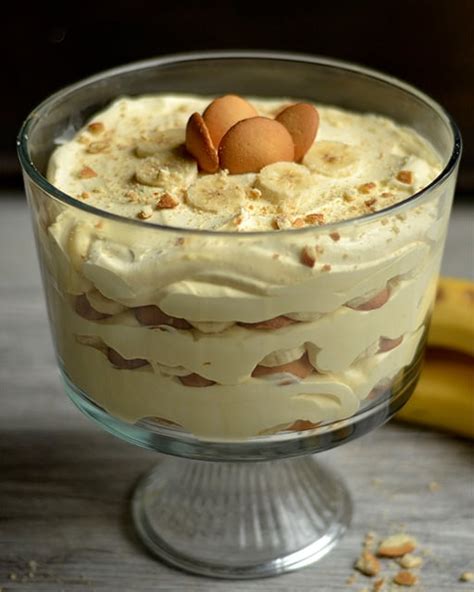
Step 2: Assembling Your Banana Pudding Masterpiece
- In a large trifle bowl or individual serving dishes, layer the ingredients as follows: Begin with a layer of vanilla wafers, followed by a layer of sliced bananas, and then a generous layer of the prepared pudding.
- Repeat the layers: wafers, bananas, pudding. End with a final layer of wafers.
- If using whipped cream, top the pudding with a dollop of whipped cream on each serving or spread it evenly over the top.
Step 3: Chilling for Perfection
Refrigerate the assembled banana pudding for at least 4 hours, or preferably overnight, to allow the flavors to meld and the pudding to set completely. This chilling time is key to enhancing the overall taste and texture.
Serving Suggestions and Variations
- Garnish: Consider garnishing with extra whipped cream, a sprinkle of cinnamon, or even a few chocolate shavings.
- Individual Portions: This recipe works perfectly for individual servings in small glasses or ramekins.
- Make it Ahead: The beauty of this recipe is that it can be prepared a day or two in advance, making it ideal for potlucks or parties.
SEO Optimization Tips for Your Banana Pudding Blog Post
This article itself demonstrates several SEO best practices:
- Keyword Optimization: The article naturally incorporates keywords like "banana pudding," "condensed milk," "recipe," and related terms throughout the text.
- Structured Data: Using headings (H2, H3) structures the content logically for both users and search engines.
- Readability: Clear, concise language enhances user experience and improves search engine ranking.
- Internal & External Linking (Not included here to avoid directing to download links): In a real-world scenario, you would link to other relevant recipes or resources on your website (internal linking) and potentially to reputable sources for ingredients (external linking – but only if appropriate and relevant, and without prompting downloads).
By following these steps and incorporating these SEO tips, you can create a delicious banana pudding and a blog post that ranks well in search results, attracting more readers to your culinary creations. Enjoy!

