Mary Berry Scones: A Classic UK Baking Recipe
The quintessential British teatime treat, scones, are best enjoyed warm with clotted cream and jam. This recipe, inspired by the legendary Mary Berry, ensures perfectly fluffy and delicious scones every time. Let's delve into the secrets of achieving that sought-after crumbly texture and delightful taste.
Ingredients for the Perfect Mary Berry Scones
This recipe provides enough for about 8 scones. Adjust quantities as needed for larger batches.
- 225g (8oz) self-raising flour: This is crucial for achieving the right rise. Don't substitute plain flour unless you add baking powder.
- 50g (2oz) cold butter: Using cold butter is key to a flaky texture. Cut it into small cubes.
- 1 ½ tsp baking powder: Ensures a light and airy scone. Check the expiry date for best results.
- 25g (1oz) caster sugar: Provides a subtle sweetness, perfectly balancing the savory notes.
- 150ml (5fl oz) milk: Use cold milk for the best results. You might need slightly more or less depending on the flour.
- Pinch of salt: Enhances the flavors and balances the sweetness.
Step-by-Step Guide: Mary Berry's Scone Recipe
1. Preparing the Dry Ingredients:
- Preheat your oven to 220°C (200°C fan/425°F/Gas Mark 7). This ensures perfectly baked scones.
- Sift the flour and baking powder into a large bowl. This aerates the flour, leading to a lighter texture.
- Add the caster sugar and salt, and gently mix them in.
2. Incorporating the Butter:
- Add the cold, cubed butter to the flour mixture.
- Using your fingertips, rub the butter into the flour until it resembles breadcrumbs. Avoid overmixing at this stage. The aim is to have pea-sized butter pieces throughout the mixture.
3. Adding the Milk and Forming the Dough:
- Gradually add the cold milk, mixing gently with a knife until a soft dough forms. Be careful not to overmix; a slightly sticky dough is preferable. Avoid kneading the dough as this will result in tough scones.
- Lightly flour your work surface. Turn the dough out onto the surface and gently pat it down to a thickness of about 2cm (¾ inch).
4. Cutting and Baking the Scones:
- Using a 5cm (2 inch) round cutter, cut out the scones. Don't twist the cutter; press down firmly to get clean edges.
- Place the scones onto a baking tray lined with baking paper.
- Brush the tops with a little milk for a golden brown finish.
5. Baking to Perfection:
- Bake for 12-15 minutes, or until the scones are well-risen and golden brown. Check for doneness by gently tapping the base; it should sound hollow.
6. Serving Your Delicious Scones:
- Once baked, let the scones cool slightly on a wire rack before serving.
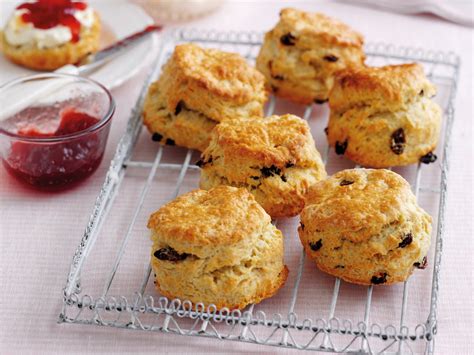
- Serve warm with clotted cream and your favorite jam – strawberry is a classic choice!
Tips for Perfect Scones: Achieving Mary Berry's Standard
- Cold ingredients are key: Using cold butter and milk is crucial for achieving a light and fluffy texture.
- Don't overmix the dough: Overmixing develops the gluten in the flour, resulting in tough scones.
- Handle the dough gently: Avoid kneading the dough; simply pat it down to the desired thickness.
- Use a sharp cutter: A sharp cutter prevents the edges from being squashed, leading to better-shaped scones.
- Don't overcrowd the baking tray: Give the scones enough space to rise properly.
This recipe, inspired by Mary Berry's expertise, will help you create perfect scones every time. Enjoy your delicious homemade treat with friends and family! Remember to share your baking success on social media using #MaryBerryScones #UKBaking #TeatimeTreats. Happy baking!

