The Ultimate Tri-Tip Sandwich Recipe: A Flavor Explosion
Are you ready to elevate your sandwich game? Look no further than this mouthwatering tri-tip sandwich recipe. This isn't your average lunchtime staple; it's a culinary experience packed with flavor and guaranteed to become your new favorite. We'll cover everything from perfectly cooking the tri-tip to assembling the ultimate sandwich, ensuring a recipe that's both delicious and easily repeatable.
Selecting and Preparing the Tri-Tip
The star of the show is, of course, the tri-tip. Choosing the right cut makes all the difference. Look for a well-marbled piece of tri-tip, ideally weighing between 2-3 pounds. A good butcher can help guide you to the perfect cut.
Preparing the Tri-Tip for Grilling or Roasting:
- Pat it dry: Use paper towels to thoroughly dry the tri-tip. This is crucial for achieving a good sear.
- Season generously: A simple rub of salt, pepper, garlic powder, and onion powder works wonders. Feel free to experiment with your favorite spices – paprika, cumin, or chili powder all add delicious depth.
- Let it rest: Allow the seasoned tri-tip to rest at room temperature for at least 30 minutes before cooking. This allows the meat to cook more evenly.
Cooking the Tri-Tip to Perfection
There are several ways to cook a tri-tip, but grilling and roasting are popular choices.
Grilling the Tri-Tip:
- High Heat Sear: Start with high heat to achieve a beautiful sear on all sides.
- Indirect Heat: Once seared, move the tri-tip to a cooler part of the grill (or use indirect heat methods) to cook it through to your desired doneness. Use a meat thermometer to ensure accuracy. For medium-rare, aim for an internal temperature of 130-135°F.
- Resting is Key: Once cooked, remove the tri-tip from the grill and let it rest, loosely tented with foil, for at least 15-20 minutes before slicing. This allows the juices to redistribute, resulting in a more tender and flavorful sandwich.
Roasting the Tri-Tip:
- Preheat your oven to 325°F (160°C).
- Place the seasoned tri-tip in a roasting pan.
- Roast for approximately 1 hour and 15 minutes to 1 hour and 45 minutes, or until the internal temperature reaches your desired doneness (again, medium-rare is 130-135°F). Use a meat thermometer for precision.
- Rest: Let the roasted tri-tip rest for at least 15-20 minutes before slicing.
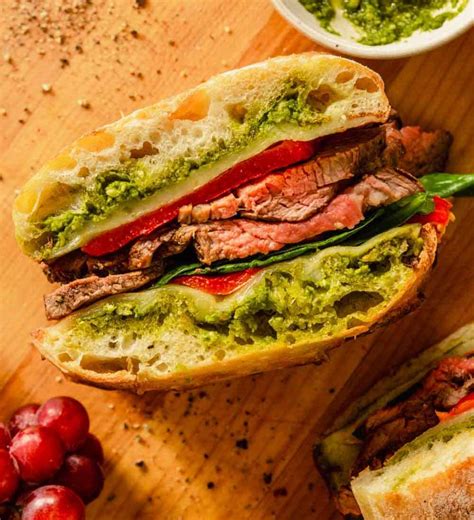
Assembling the Ultimate Tri-Tip Sandwich
Now for the fun part! Slicing the rested tri-tip against the grain is essential for maximum tenderness.
Ingredients for the Sandwich:
- Sliced Tri-Tip: The star of the show!
- Ciabatta Roll or Similar: A sturdy roll that can hold up to the juicy tri-tip.
- Caramelized Onions: Adds sweetness and depth of flavor.
- Horseradish Mayo: A creamy and tangy sauce that perfectly complements the rich tri-tip. (Mix mayonnaise with prepared horseradish to taste).
- Provolone Cheese (optional): Melts beautifully and adds a salty, creamy element.
Building the Perfect Sandwich:
- Spread Horseradish Mayo: Generously spread the horseradish mayo on both halves of the roll.
- Layer Caramelized Onions: Add a layer of sweet caramelized onions.
- Add the Tri-Tip: Place slices of the perfectly cooked tri-tip on one half of the roll.
- Cheese (Optional): If using, add a slice of provolone cheese.
- Assemble: Top with the other half of the roll and enjoy!
Tips for Success
- Don't overcook the tri-tip! Overcooked tri-tip will be dry and tough. Use a meat thermometer to ensure perfect doneness.
- Let the tri-tip rest! This is crucial for a juicy and tender sandwich.
- Experiment with toppings! Get creative and add your favorite sandwich fixings. Consider adding peppers, mushrooms, or different cheeses.
This tri-tip sandwich recipe is a guaranteed crowd-pleaser. The combination of perfectly cooked tri-tip, flavorful toppings, and a delicious sauce creates a sandwich experience that's both satisfying and unforgettable. So fire up the grill or preheat your oven and get ready for a truly amazing meal!

