The Ultimate Guide to Making Delicious Vegan Cream Cheese
Making your own vegan cream cheese is easier than you think! This comprehensive guide will walk you through creating a creamy, tangy, and utterly delicious spread that's perfect for bagels, crackers, or as a base for dips and sauces. Forget store-bought versions – this recipe delivers superior flavor and texture, all while being completely plant-based.
Why Make Your Own Vegan Cream Cheese?
There are numerous reasons to ditch the store-bought vegan cream cheese and make your own:
- Control over Ingredients: You know exactly what's going into your cream cheese, avoiding any unwanted additives or preservatives.
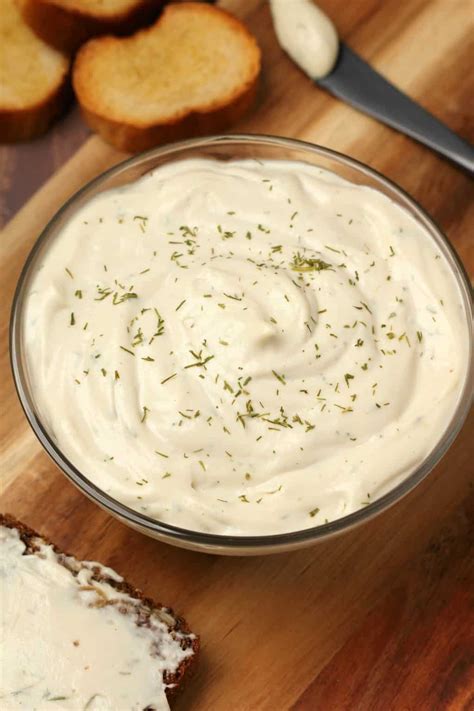
- Superior Taste and Texture: Homemade vegan cream cheese often boasts a richer, creamier texture and a more vibrant, natural flavor than commercially produced options.
- Cost-Effective: Making your own is significantly cheaper than buying it, especially in the long run.
- Customization: Easily adjust the ingredients to create different flavor profiles – add herbs, spices, or even roasted red peppers for a unique twist!
Ingredients You'll Need:
This recipe utilizes readily available ingredients, making it a breeze to create. You'll need:
- 1 cup raw cashews, soaked in hot water for at least 30 minutes (or overnight for extra creaminess)
- 1/2 cup nutritional yeast (for that cheesy flavor!)
- 1/4 cup lemon juice (freshly squeezed is best)
- 2 tablespoons water (more as needed for consistency)
- 1 tablespoon apple cider vinegar (adds tanginess)
- 1 teaspoon garlic powder
- 1/2 teaspoon onion powder
- 1/4 teaspoon salt (or to taste)
Step-by-Step Instructions:
-
Drain and Rinse: After soaking, thoroughly drain and rinse the cashews. This removes excess starch and ensures a smoother texture.
-
Blend it Up: Combine all ingredients in a high-speed blender. Blend until completely smooth and creamy. This may take a few minutes. If the mixture is too thick, add water, one tablespoon at a time, until you reach your desired consistency.
-
Taste and Adjust: Taste your cream cheese and adjust seasonings as needed. You might want more lemon juice for extra tang, or more salt for a sharper flavor.
-
Chill and Enjoy: Transfer the cream cheese to an airtight container and refrigerate for at least 2 hours to allow the flavors to meld and the cream cheese to firm up.
Tips for the Perfect Vegan Cream Cheese:
- Soaking the Cashews: Soaking the cashews is crucial for creating a creamy texture. Hot water softens them, making them easier to blend into a smooth consistency. Overnight soaking is ideal!
- Nutritional Yeast is Key: This ingredient delivers the signature cheesy flavor. Don't skip it!
- Fresh Lemon Juice: Freshly squeezed lemon juice provides the best flavor and tang.
- Adjust Consistency: The amount of water you add will determine the cream cheese's consistency. Start with less and add more as needed.
- Get Creative with Flavors: Once you've mastered the basic recipe, experiment with adding different flavors! Try roasted red peppers, chives, jalapenos, or your favorite herbs and spices.
Serving Suggestions:
Your homemade vegan cream cheese is incredibly versatile:
- Bagels and Toast: The classic combination!
- Crackers and Vegetables: A perfect healthy snack.
- Dips and Spreads: Use as a base for dips like spinach and artichoke dip or a flavorful veggie spread.
- Sandwiches and Wraps: Add a creamy layer to your favorite sandwiches.
- Pasta Dishes: A delicious addition to creamy pasta sauces.
FAQs:
Q: How long does homemade vegan cream cheese last?
A: Stored in an airtight container in the refrigerator, it should last for about 5-7 days.
Q: Can I freeze vegan cream cheese?
A: Yes, you can freeze it for up to 2 months. Thaw it in the refrigerator overnight.
Q: Can I use other nuts instead of cashews?
A: While cashews create the creamiest texture, you can experiment with other nuts like almonds or macadamia nuts, but the texture might differ slightly.
This recipe empowers you to create a healthier, tastier, and more cost-effective alternative to store-bought vegan cream cheese. Enjoy the process, experiment with flavors, and savor the delicious results!

