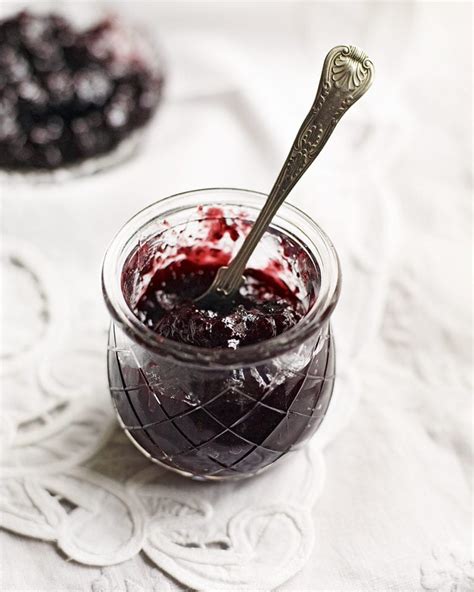
Damson Jam Recipe: A Taste of Autumn
Autumn's bounty brings forth many delicious fruits, and among them, the damson plum stands out. These small, dark plums possess a unique tartness that makes them perfect for creating a rich and flavorful jam. This damson jam recipe will guide you through the process, resulting in a delicious spread perfect for toast, scones, or even cheese.
Ingredients for the Perfect Damson Jam
Before you begin, gather these ingredients to ensure a smooth jam-making experience:
- 1kg Damsons: Choose ripe, but firm damsons. Avoid those that are overly soft or bruised.
- 700g Granulated Sugar: The sugar acts as a preservative and balances the tartness of the damsons. Adjust slightly depending on the sweetness of your fruit.
- Juice of 1 Lemon: The lemon juice helps to set the jam and adds a bright, citrusy note.
- Optional: 1-2 tsp Spiced Rum or Brandy: A dash of alcohol enhances the flavor profile and adds a warming touch. (Omit for alcohol-free jam).
Step-by-Step Damson Jam Making Guide
This detailed guide ensures a perfect batch every time:
1. Preparing the Damsons
- Wash and Prick: Thoroughly wash the damsons and prick each one several times with a fork. This helps them release their juices during cooking.
2. The Cooking Process
- Combine Ingredients: Place the prepared damsons in a large, heavy-bottomed saucepan. Add the sugar and lemon juice. Gently stir to combine.
- Gentle Heat: Place the pan over a medium heat and stir occasionally until the sugar dissolves completely. Avoid high heat to prevent burning.
- Simmering: Bring the mixture to a gentle simmer, stirring frequently to prevent sticking. Continue to simmer until the jam reaches setting point.
- Checking for Setting Point: The setting point is crucial. There are a few ways to test it:
- Wrinkle Test: Place a small spoonful of jam onto a chilled plate. Let it cool for a minute. Push the jam with your finger. If the surface wrinkles, it's ready.
- Cold Plate Test: Place a small spoonful of jam onto a chilled plate. After a minute, push the jam with a spoon. If the jam sets and wrinkles, it's ready.
3. Potting the Jam
- Sterilize Jars: Before you begin, sterilize your jars and lids by washing them thoroughly in hot, soapy water and then rinsing with boiling water. This prevents mold growth.
- Fill the Jars: Carefully ladle the hot jam into the sterilized jars, leaving a small headspace (about 1cm).
- Seal the Jars: Securely tighten the lids.
- Cool and Label: Allow the jars to cool completely. Once cool, check that the seals are airtight. Label your jars with the date.
Tips for the Best Damson Jam
- Use ripe but firm Damsons: Overripe damsons will result in a softer jam.
- Don’t rush the cooking process: Allow the jam to simmer gently to achieve the desired texture and setting point.
- Sterilize your jars properly: This is essential for preserving your homemade jam.
- Experiment with spices: Add a cinnamon stick or a pinch of cloves for a warmer flavor profile.
- Store in a cool, dark place: Your homemade damson jam should last for several months if stored correctly.
Beyond the Recipe: Using Your Damson Jam
Your homemade damson jam is incredibly versatile! Here are some ideas:
- Toast and Butter: The classic pairing.
- Scones and Cream: A delightful afternoon treat.
- Yogurt and Granola: Add a burst of flavor to your breakfast.
- Cakes and Pies: Use it as a filling or glaze.
- Cheese and Biscuits: A sophisticated appetizer.
This damson jam recipe allows you to capture the essence of autumn in a jar. Enjoy the process, and savor the delicious results! Remember to share your homemade jam with friends and family – it's the perfect homemade gift!

