Ballerina Farm Sourdough: A Step-by-Step Guide to Rustic Perfection
Sourdough bread, with its tangy flavor and chewy texture, is a culinary delight. This recipe, inspired by the rustic charm of a Ballerina Farm setting, guides you through creating a beautiful and delicious loaf. We'll focus on achieving that perfect balance of tang and chew, highlighting key techniques for sourdough success.
Understanding Your Starter: The Heart of Ballerina Farm Sourdough
Before we begin, ensure your sourdough starter is active and bubbly. A healthy starter is crucial for achieving the desired flavor and rise. Feed it a few hours before you start this recipe to ensure it's at its peak performance. Remember, a happy starter equals happy bread!
Assessing Starter Activity:
- Visual Inspection: Look for significant bubbles and a doubled-in-size appearance.
- Float Test: A spoonful of starter should float in a glass of water, indicating sufficient gas production.
Ingredients for your Ballerina Farm Sourdough Loaf:
- Active Sourdough Starter: 200g (fed 4-6 hours prior)
- Water: 300g (lukewarm)
- Bread Flour: 500g (high protein is best)
- Salt: 10g
Step-by-Step Ballerina Farm Sourdough Baking Process:
1. Autolyse: Awakening the Flour
In a large bowl, combine the flour and water. Mix gently until just combined, avoiding overmixing. Cover the bowl and let it rest for 30-60 minutes. This autolyse allows the flour to fully hydrate, resulting in a more developed gluten structure and improved dough texture.
2. Incorporating the Starter:
Add your active sourdough starter to the autolysed dough. Gently fold the starter into the dough until evenly distributed. Avoid vigorous mixing at this stage.
3. Bulk Fermentation: The Rise Begins
- Adding Salt: After 30 minutes, incorporate the salt by gently folding it into the dough.
- Stretching and Folding: Every 30 minutes for the next 2-3 hours, perform "stretching and folding." This technique strengthens the gluten and develops the dough's structure. To do this, gently stretch a portion of the dough upwards and fold it over itself. Rotate the bowl 90 degrees and repeat this process until you've worked around the entire bowl.
- Observation: The dough should gradually increase in volume and become smoother.
4. Shaping the Ballerina Farm Loaf:
- Pre-Shape: Gently turn the dough out onto a lightly floured surface. Form it into a loose ball. Let it rest for 20-30 minutes, covered.
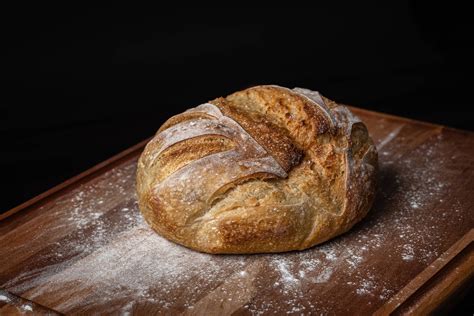
- Final Shape: Gently shape the dough into a tight boule or batard (oval) shape. This is where you can get creative! A perfectly round boule or a rustic batard both work beautifully.
5. Proofing: The Final Rise
Place the shaped dough into a well-floured banneton basket (or a bowl lined with a floured kitchen towel). Cover and let it proof in the refrigerator for 12-18 hours. This slow cold proof develops flavor and improves the crumb structure.
6. Baking your Ballerina Farm Sourdough:
- Preheat Oven: Preheat your oven to 500°F (260°C) with a Dutch oven inside for at least 30 minutes.
- Score the Dough: Carefully remove the dough from the banneton and place it in the preheated Dutch oven. Score the top of the dough with a sharp knife or lame to control expansion during baking.
- Bake: Cover and bake for 20 minutes. Then, remove the lid and bake for another 25-30 minutes, or until the crust is deeply golden brown and the internal temperature reaches 205-210°F (96-99°C).
- Cool: Let the bread cool completely on a wire rack before slicing and enjoying.
Tips for Ballerina Farm Sourdough Success:
- Room Temperature: Ensure your ingredients are at room temperature for optimal fermentation.
- Hydration: The hydration level (ratio of water to flour) can be adjusted slightly depending on your flour and environment.
- Experimentation: Don't be afraid to experiment with different flours and shaping techniques to find your perfect Ballerina Farm sourdough loaf!
This recipe provides a solid foundation. With practice and patience, you'll be baking beautiful and delicious Ballerina Farm sourdough loaves in no time! Remember to document your baking journey and share your beautiful creations! Happy baking!

