The Ultimate Guide to Perfectly Poached Pears
Poached pears are an elegant and surprisingly simple dessert, perfect for a romantic dinner or a sophisticated afternoon tea. This guide will walk you through creating perfectly poached pears, every time. We'll cover everything from selecting the right pears to mastering the poaching liquid and serving suggestions. Get ready to impress!
Choosing the Right Pears
The key to perfectly poached pears is selecting the right variety. Firm-fleshed pears that hold their shape well during poaching are essential. Avoid overly ripe or soft pears, as they'll likely fall apart. Excellent choices include:
- Bosc Pears: These have a classic pear shape with a slightly gritty texture that holds up well.
- Anjou Pears: These are slightly sweeter and softer than Bosc, but still suitable for poaching.
- Bartlett Pears (Williams Pears): While these are delicious, they tend to become very soft when poached, so they might be better suited for another recipe.
Ingredients for the Poaching Liquid
The poaching liquid is where the magic happens! A simple yet flavorful combination creates a delicious and aromatic syrup. Here's what you'll need:
- 1 cup Water: Provides the base for your poaching liquid.
- 1 cup Dry White Wine: Adds complexity and depth of flavor. You can substitute with apple juice for a non-alcoholic option.
- ½ cup Sugar: Sweetens the pears and creates a luscious syrup. Adjust to your preference.
- 1 Cinnamon Stick: Adds warm spice notes.
- 2 Star Anise: Provides a subtle licorice flavor.
- 2 Cloves: Adds a hint of warmth and complexity.
- 1 Vanilla Bean (optional): Enhances the flavor with a rich vanilla aroma. A teaspoon of vanilla extract can be substituted.
Step-by-Step Poached Pears Recipe
This recipe yields approximately 4 poached pears.
1. Prepare the Pears: Gently peel the pears, leaving the stems intact. This keeps them elegant and prevents them from disintegrating. Carefully cut the pears in half lengthwise and remove the cores using a melon baller or small spoon.
2. Make the Poaching Liquid: Combine the water, wine (or juice), sugar, cinnamon stick, star anise, cloves, and vanilla bean (or extract) in a medium saucepan. Bring the mixture to a simmer over medium heat, stirring until the sugar dissolves completely.
3. Poach the Pears: Gently place the pear halves in the simmering liquid, ensuring they are mostly submerged. Reduce the heat to low, cover the saucepan, and simmer for 20-30 minutes, or until the pears are tender but still hold their shape. The cooking time will depend on the ripeness of your pears and the size of the halves.
4. Cool and Serve: Carefully remove the pears from the poaching liquid and place them on a plate to cool slightly. You can store them in the refrigerator in the poaching liquid for up to 3 days.
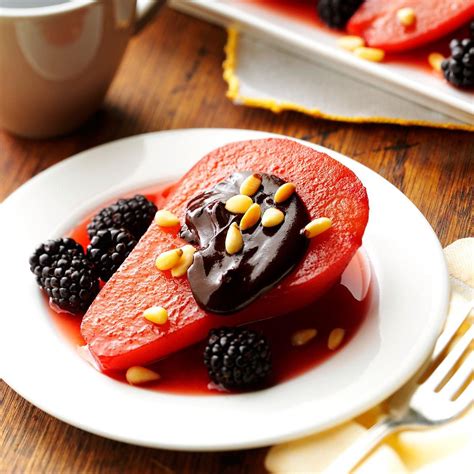
5. Serve: Serve the poached pears warm or chilled, drizzled with the flavorful poaching syrup. They're delicious on their own, paired with ice cream, whipped cream, yogurt, or crumbled cheese.
Serving Suggestions and Variations
Get creative with your poached pears! Here are some ideas:
- Dessert: Serve them with vanilla ice cream, crème fraîche, or a dollop of mascarpone cheese.
- Breakfast: Add them to your oatmeal or yogurt for a sophisticated breakfast treat.
- Side Dish: They can be served alongside roasted meats or poultry.
- Flavor Variations: Experiment with different spices like cardamom, ginger, or allspice. Add a splash of orange liqueur or Grand Marnier for an extra layer of flavor.
SEO Keywords Used:
poached pears, poached pears recipe, poached pear recipe easy, how to poach pears, perfect poached pears, best poached pears recipe, easy poached pears, Bosc pears poached, Anjou pears poached, poaching pears in wine, poached pears dessert, poached pears with vanilla, poached pear variations.
By following these steps and incorporating the tips and variations, you can confidently create stunning poached pears that will impress your guests and elevate your culinary skills. Enjoy!

